
Task 2: Microsoft Small Basic
Task SummaryWhat you will learn: During this task you will learn the Small Basic programming language and you will use algorithms to create shapes.
How will you be accessed: You will need to draw your own unique shape and submit with the coding. |
Key terminology
|
Before we begin
Firstly: If your computer does not have Microsoft Small Basic then Click Here to download for free.
Secondly: All of the code used in this activity can be found in the PDF document below |
| An introduction to Microsoft Small Basic |
| bat_and_ball.sb |
Activities
Activity 1: Create your Graphics Window
|
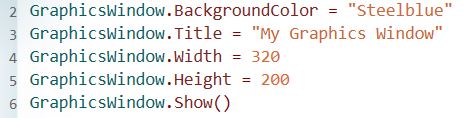
Before we start to create shapes we first need to create a graphics window. The window that our shapes will be viewed in can be created easy by using the adjacent code:
|
|
Extension task: Try using Hexadecimal code to create the background colour - A Hexadecimal colour chart should be on the classroom wall.
Activity 2: Adding some shapes
|
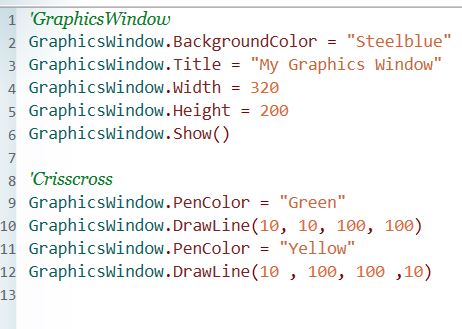
Type the following code below the code code you typed for your graphics window:
|
TaskPlay with the code to make the shape half the size and appear in the center of the graphics window.
|

|
Note: the first line: 'Crisscross is a comment. Comments are just for the reference of the programmer. Comments will be ignored by the computer when the program is run.
|
Activity 3: Shapes Shapes Shapes
Line Colour
|
We will now add some colour to the crisscross you have drawn. We will make one line green by adding the code
GraphicsWindow.PenColor = "Green" And the other line yellow by adding the code: GraphicsWindow.PenColor = "Yellow" Note that when two words are written together such as PenColor, then each word starts with a upper case letter(CAPITAL LETTER). This is common practice in most program languages. You code should now look like the one shown. |
|
Pen Width
We will now change the thickness of the lines. To do this use the code: GraphicsWindow.PenWidth = 10
You should now be able to workout where in the code you need to place this line of code to change the line thickness.
Activity: Change the thickness of both lines to size 10.
Save your work for future reference or checking.
You should now be able to workout where in the code you need to place this line of code to change the line thickness.
Activity: Change the thickness of both lines to size 10.
Save your work for future reference or checking.
Rectangles
|
Start a new project. Create a new graphics window with a width of 400 and a height of 300.
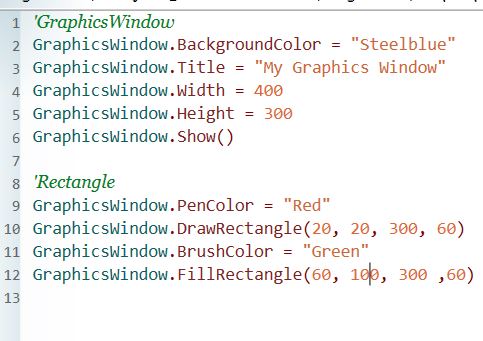
We will now use the Draw and the Fill features of Small Basic. The code provided will create two rectangles, one with a red outline and no fill and one with no outline and green fill. Activity: can you change the code to make then two rectangles to make one rectangle with a red outline and green fill. Save your code before moving on to the next task. |
|
Hint: To save time you can copy your previous code then make a few changes to suit the next activity.
Ellipse
|
Start a new project. Create a new graphics window with a width of 400 and a height of 300.
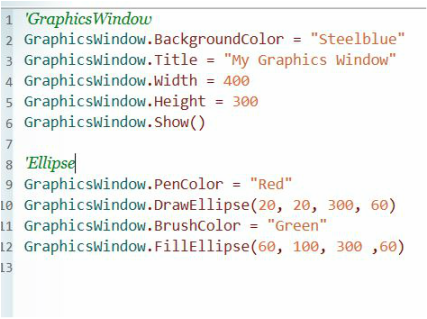
We will now use the Ellipse feature of Small Basic. The code provided will create two Elliptical shapes , one with a red outline and no fill and one with no outline and green fill. Activity: can you change the code to make then two elliptical shapes to make one elliptical shape with a red outline and green fill. |
|
Activity: Change two of the numbers in the coding to make the ellipse a circle. Save your work.
Activity 4: Algorithms to make more complex shapes
|
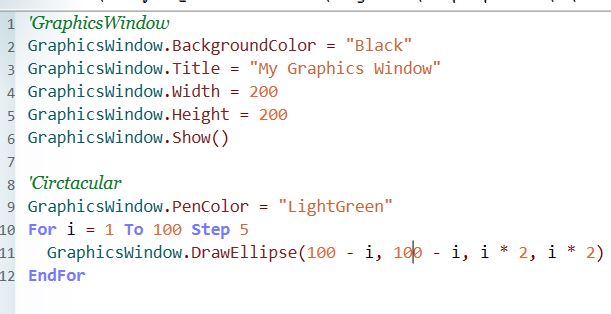
Start a new project. Create a new graphics window with a width of 200 and a height of 200.
We will now use a For Loop function to create multiple circles. Activity: When you have successfully create the graphic as seen in Figure 1, have a pay with the code and see what each section does. For example: what happens if you change both the i = 2 to i = 4? You may want to make the graphics window bigger for your new work. Activity: Can you change the code to make multiple rectangles? |
|
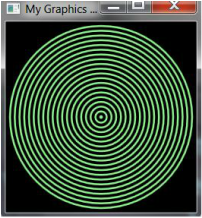
Figure 1
|
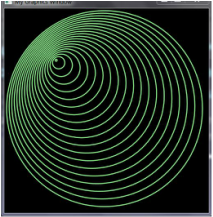
Figure 2
|
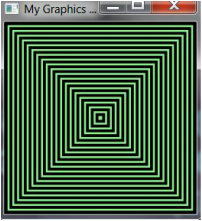
Figure 3
|
Save different copies of your work showing different designs.
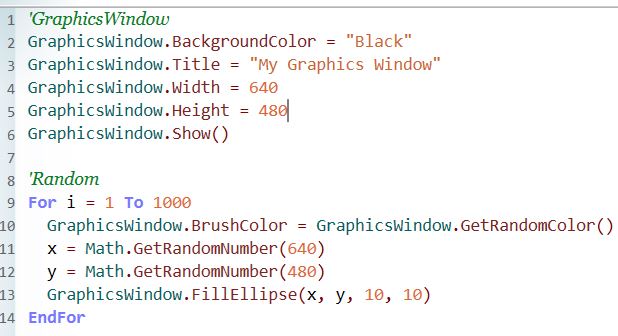
Randomise
|
Start a new project. Create a new graphics window with a width of 640 and a height of 480.
We will now use a For Loop function to create multiple circles in random places. Activity: Make a comment in the code to explain what the x and y do in the line " GraphicsWindow.FillEllipse(x, y, 10, 10) " Activity: Can you change the code to make multiple rectangles? |
|
Save copies of your work showing different designs
Assessment Task 1
Make your own Shape
|
You need to use what you have learnt in Microsoft Small Basic to produce a unique shape of your own. A basic guideline for grading is shown below.
Grade D: Create a basic shape and show correct use of coding Grade C: Create a complex shape where each element of the shape has been manually written in the code with no For Loops.. Grade B: Create a complex shape with lengthy code, with little algorithm used and including For Loops Grade A: Create a algorithm within the code that generates a complex shape from a minimal amount of code. You can use the form from below to submit your response. |
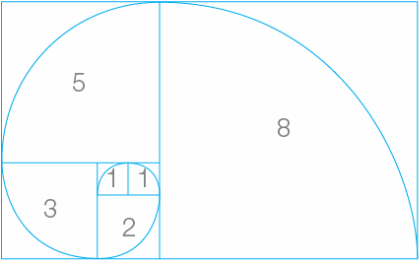
The image above shows an example of what could be classed as a complex image and could be drawn using an algorithm.
|
Going for Gold
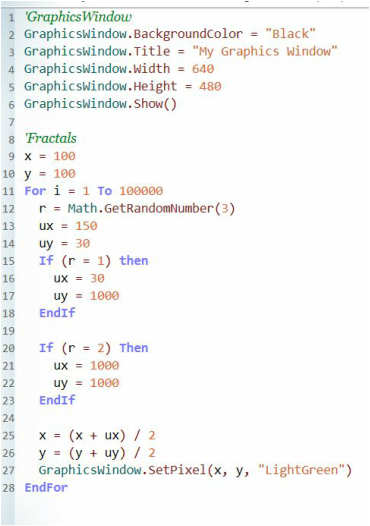
Drawing Fractals
|
Start a new project. Create a new graphics window with a width of 640 and a height of 480.
We will now use The Math function, The If function and the For Loop Function. 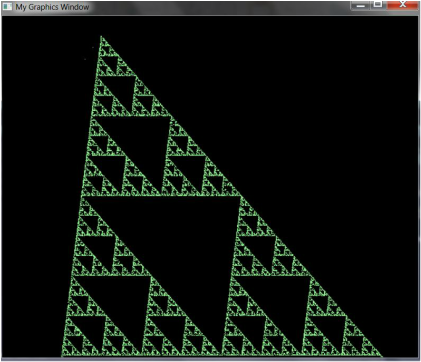
|
|
Pay with the code and try to create your own interesting shape. Save your work.
